漏扫漏洞修复记录
发表于|更新于|漏扫漏洞
|总字数:1.2k|阅读时长:5分钟|浏览量:
漏洞修复记录
检测到目标X-Content-Type-Options响应头缺失
解决方式
nginx 增加响应头配置:
add_header X-Content-Type-Options "nosniff" always; |
检测到目标X-XSS-Protection响应头缺失
解决方式
add_header X-XSS-Protection "1; mode=block" always; |
Web服务器未能正确处理异常请求导致Web服务器版本信息泄露,攻击者收集到服务器信息后可进行进一步针对性攻击。
针对错误页面做调整优化
检测到目标Content-Security-Policy响应头缺失
解决方式
add_header Content-Security-Policy "script-src 'self' 'unsafe-inline' 'unsafe-eval'" always; |
检测到目标服务器启用了OPTIONS方法
检测到目标Referrer-Policy响应头缺失
解决方式
add_header Referrer-Policy "origin" always; |
检测到目标Strict-Transport-Security响应头缺失
解决方式
add_header Strict-Transport-Security "max-age=63072000; includeSubdomains; preload" always; |
检测到目标X-Permitted-Cross-Domain-Policies响应头缺失
解决方式
add_header X-Permitted-Cross-Domain-Policies "master-only" always; |
检测到目标X-Download-Options响应头缺失
解决方式
add_header X-Download-Options "noopen" always; |
点击劫持:X-Frame-Options未配置
解决方式
add_header X-Frame-Options "sameorigin" always; |
内链补充
ICMPtimestamp请求响应漏洞处理(CVE-1999-0524)
Nginx安全配置样例
http { |
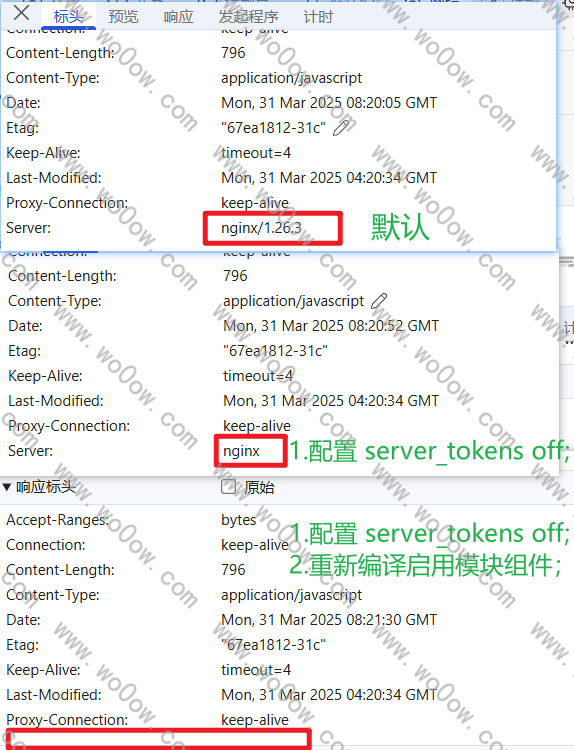
nginx/tomcat-修复:可通过HTTP获取远端WWW服务信息
进入nginx的安装目录(执行make install后安装的目录,例:/usr/local/nginx)
cd /home/env/nginx/sbin/ |
查询nginx版本信息
./nginx -V |

复制configure arguments后的配置命令,并在nginx-1.26.3原始解压目录下执行
./configure --prefix=/home/env/nginx --with-http_stub_status_module --with-http_ssl_module --add-module=/home/env/nginx/nginx-1.26.3/src/headers-more-nginx-module-0.37 |
若引用新版ssl需追加配置命令:
--with-openssl=/usr/local/openssl_3.3

修改当前nginx解压目录下配置文件
vim usr/local/nginx-x.x.x/auto/lib/openssl/conf |
移除.openssl目录信息后,重新进行Nginx的编译安装即可
#CORE_INCS="$CORE_INCS $OPENSSL/.openssl/include" |
若重新./configure后在执行make命令报错
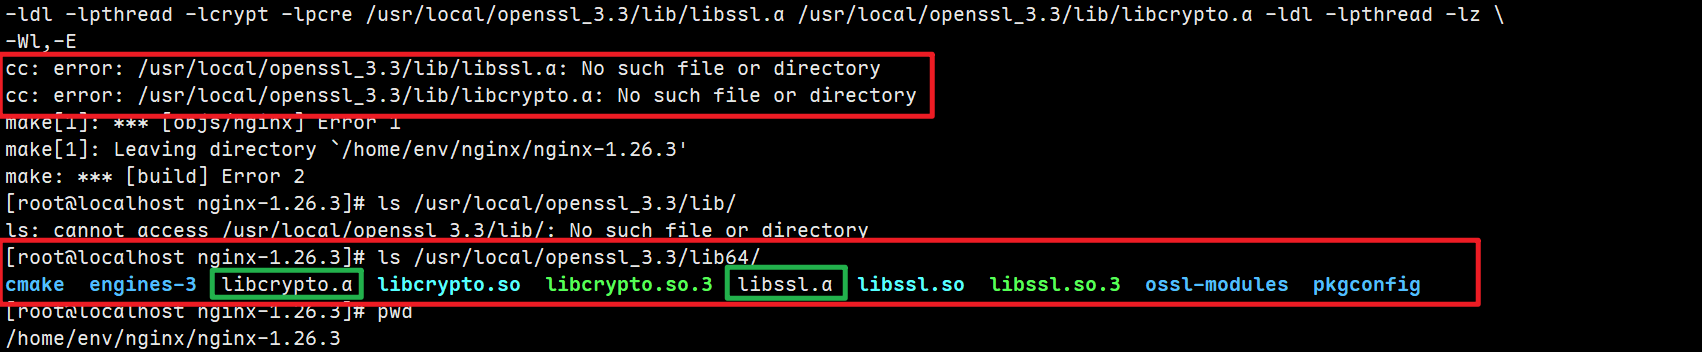
建立软链接
ln -snf /usr/local/openssl_3.3/lib64/libssl.a /usr/local/openssl_3.3/lib/libssl.a |
建立软连接报错,提示目录不存在,则手动创建目录即可
重新执行make
注意:不要执行
make install覆盖安装
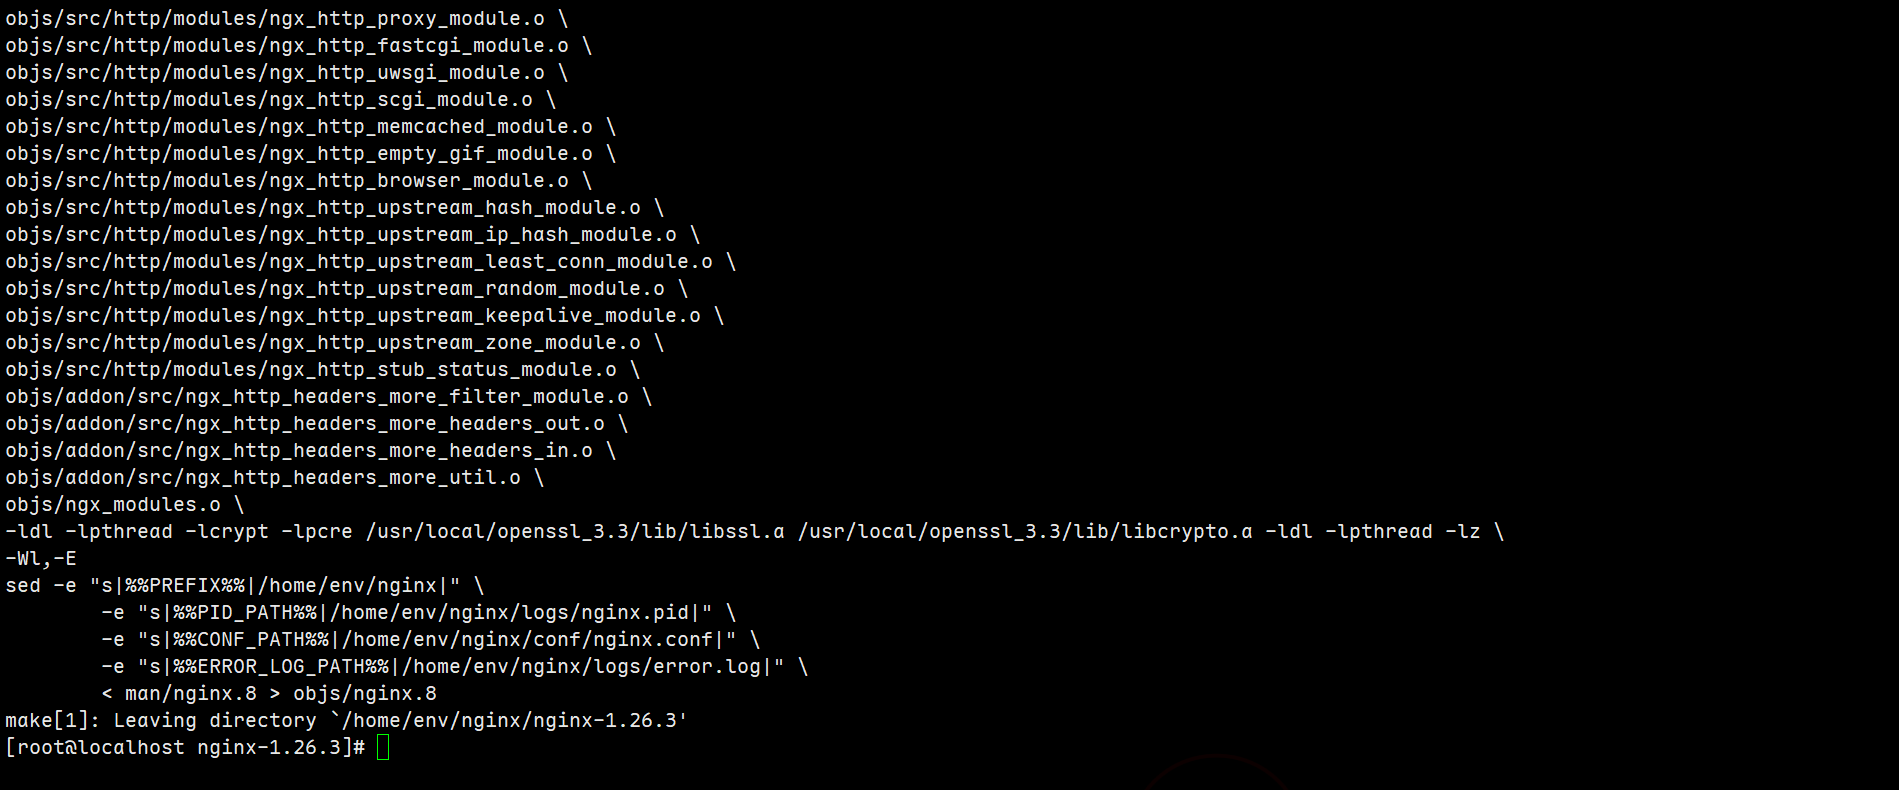
备份原已安装nginx
cp /usr/local/nginx/sbin/nginx /usr/local/nginx/sbin/nginx.bak |
将编译好的nginx复制过去
编译后的nginx在源码
/home/env/nginx/nginx-1.26.3/objs路径下
cp nginx /home/env/nginx/sbin/ |
查看Nginx版本信息
修改配置文件/usr/local/nginx/conf/nginx.conf
http 中添加 下面一行
more_clear_headers 'Server'; |
相关参考博客
文章作者: MUMU
版权声明: 本博客所有文章除特别声明外,均采用 CC BY-NC-SA 4.0 许可协议。转载请注明来源 blog.wo0ow.com!
赞助
 微信
微信- 支付宝